DJI Fpv speed racing drone RC Quadcopter FPV

Here are the specs. waiting to order mine 🙂 on 2nd march

  • 10KM range
  • 1080P
  • FPV 4K 60fps Camera
  • 20mins Flight Time
  • 140 km/h Speed
  • Goggles V2 5.8GHz
  • Transmitter Mode2
Aircraft Takeoff Weight Approx. 795 g
Dimensions 255×312×127 mm (with propellers) 
178×232×127 mm (without propellers)
Diagonal Distance 245 mm
Max Ascent Speed

M mode: No limit

S mode: 15 m/s

N mode: 8 m/s

Max Descent Speed

M mode: No limit

S mode: 10 m/s

N mode: 5 m/s

Max Speed 140 km/h(100km/h in Mainland China)
M mode: 39 m/s (27 m/s in Mainland China)
S mode: 27 m/s 
N mode: 15 m/s 
Max Acceleration 0-100 kph: 2 s (in ideal conditions while flying in M mode)
Max Service Ceiling Above Sea Level 6,000 m
Max Flight Time(without wind) Approx. 20 mins (measured while flying at 40 kph in windless conditions)
Max Hover Time  Approx. 16 mins (measured when flying in windless conditions)
Max Flight Distance 16.8 km (measured while flying in windless conditions)
Max Wind Speed Resistance 39-49 kph (25-31 mph)
Number of Antennas Four
GNSS GPS+GLONASS+GALILEO
Hovering Accuracy Range Vertical: 
±0.1 m (with Vision Positioning) ±0.5 m (with GPS positioning)
Horizontal: 
±0.3 m (with Vision Positioning) ±1.5 m (with GPS positioning)
Supported SD Cards microSD (up to 256 GB)
Operating Temperature -10° to 40° C (14° to 104° F)
Internal Storage N/A
Camera Sensor 1/2.3” CMOS
Effect pixels: 12 million
Lens  FOV: 150°
35mm Format Equivalent: 14.66 mm
Aperture: f/2.8
Focus Mode: Fixed Focus
Focus Range: 0.6 m to ∞
ISO 100-12800
Shutter Speed 1/50-1/8000 s
Still Photography Modes Single shot
Max Image Size 3840×2160
Photo Format JPEG
Video Resolution 4K: 3840×2160 at 50/60fps
FHD: 1920×1080 at 50/60/100/120fps
Video Formats MP4/MOV (H.264/MPEG-4 AVC, H.265/HEVC)
Max Video Bitrate 120 Mbps
Color Profile Standard, D-Cinelike
RockSteady EIS Available
Distortion Correction Available
Supported File Formats exFAT (recommended)
FAT32 
 
Gimbal Mechanical Range Tilt: -65° to 70°
Controllable Range Tilt: -50° to 58°
Stabilization Single-axis (tilt), electronic roll axis
Max Control Speed  60°/s 
Angular Vibration Range ±0.01° (N mode)
Electronic Roll Axis Available (can stabilize footage when the aircraft is tilted at angles of up to 10°) 
Sensing System Forward  Precision Measurement Range: 0.5-18 m 
Obstacle Sensing: Available in N mode only
FOV: 56° (horizontal), 71° (vertical)
Downward (dual vision sensors + TOF) TOF Effective Sensing Height: 10 m 
Hovering Range: 0.5-15 m 
Vision Sensor Hovering Range: 0.5-30 m
Downward Auxillary Light Single LED
Operating Environment

Refers to non-reflective, discernible surfaces

Diffuse reflectivity >20% (e.g. walls, trees, people)
Adequate lighting conditions (lux >15 in normal indoor lighting conditions)

Video Transmission Operating Frequency 2.400-2.4835 GHz
5.725-5.850 GHz
Communication Bandwidth 40 MHz (Max.)
Live View Mode Low-Latency Mode: 810p/120fps ≤ 28ms
High-Quality Mode: 810p/60fps ≤ 40ms
Max Video Bitrate 50 Mbps
Transmission Range 10 km (FCC), 6 km (CE), 6 km (SRRC), 6 km (MIC)
Audio Transmission Support Yes
DJI FPV Goggles V2 Weight Approx. 420 g (headband and antennas included)
Dimensions 184×122×110 mm (antennas excluded) 
202×126×110 mm (antennas included)
Screen Size 2-inches (×2)
Screen Refresh Rate 144 Hz
Communication Frequency <sup>[1]</sup> 2.400-2.4835 GHz
5.725-5.850 GHz
Transmitter Power (EIRP)

2.400-2.4835 GHz
FCC: ≤ 28.5 dBm

CE: ≤ 20 dBm

SRRC: ≤ 20 dBm

MIC: ≤ 20 dBm


5.725-5.850 GHz
FCC: ≤ 31.5 dBm

CE: ≤ 14 dBm

SRRC: ≤ 19 dBm

Communication Bandwidth 40 MHz (Max.)
Live View Mode Low-Latency Mode: 810p/120fps ≤ 28ms*
High-Quality Mode: 810p/60fps ≤ 40ms*
* A 150° FOV is available when shooting at 50 or 100 fps. For other frame rates, the FOV will be 142°.
Max Video Bitrate 50 Mbps
Transmission Range  10 km (FCC), 6 km (CE), 6 km (SRRC), 6 km (MIC)
Video Format MP4 (Video format: H.264)
Supported Video and Audio Playback Formats MP4, MOV, MKV (Video format: H.264; Audio format: AAC-LC, AAC-HE, AC-3, MP3)
Operating Temperature 0° to 40° C (32° to 104° F)
Power Input Dedicated DJI Goggles batteries or other 11.1.-25.2 V batteries.
FOV FOV: 30° to 54°; Image size: 50-100%
Interpupillary Distance Range 58-70 mm
Supported microSD Cards microSD (up to 256 GB)
DJI FPV Remote Controller Operating Frequency 2.400-2.4835 GHz
5.725-5.850 GHz
Transmitter Power (EIRP) 2.400-2.4835 GHz
FCC: ≤ 28.5 dBm CE: ≤ 20 dBm SRRC: ≤ 20 dBm MIC: ≤ 20 dBm
5.725-5.850 GHz
FCC: ≤ 31.5 dBm CE: ≤ 14 dBm SRRC: ≤ 19 dBm
Max. Transmission Distance 10 km (FCC), 6 km (CE), 6 km (SRRC), 6 km (MIC)
Gimbal Dimensions 190×140×51 mm
Weight 346 g
Battery Life  Approx. 9 hours
Charging Time 2.5 hours
Motion Controller Model  FC7BMC 
Weight  167 g
Operating Frequency Range  2.400-2.4835 GHz; 5.725-5.850 GHz
Max Transmission Distance (unobstructed, free of interference)  10 km (FCC), 6 km (CE/SRRC/MIC) 
Transmitter Power (EIRP)  2.4 GHz: ≤28.5 dBm (FCC), ≤20 dBm (CE/ SRRC/MIC)
5.8 GHz: ≤31.5 dBm (FCC), ≤19 dBm (SRRC), ≤14 dBm (CE)
Operating Temperature Range  -10° to 40° C (14° to 104° F) 
Battery Life  300 minutes
microSD Card Supported microSD cards Max 256 GB
UHS-I Speed Grade 3
Recommended microSD cards SanDisk High Endurance U3 V30 64GB microSDXC
SanDisk Extreme PRO U3 V30 A2 64GB microSDXC
SanDisk Extreme U3 V30 A2 64GB microSDXC
SanDisk Extreme U3 V30 A2 128GB microSDXC
SanDisk Extreme U3 V30 A2 256GB microSDXC
Lexar 667x V30 128GB microSDXC
Lexar High Endurance 128GB U3 V30 microSDXC
Samsung EVO U3 (Yellow) 64GB microSDXC
Samsung EVO Plus U3 (Red) 64GB microSDXC
Samsung EVO Plus U3 256GB microSDXC
Netac 256GB U3 A1 microSDXC
Goggles Battery Capacity 1800 mAh
Voltage 9 V (Max.)
Type LiPo 2S
Energy 18 Wh
Charging Temperature 0° to 45° C
Max Charging Power 10 W
Battery Life  Approx. 110 minutes (measured in an environment of 25°C at maximum brightness level)
Intelligent Flight Battery Battery Capacity 2000 mAh
Voltage 22.2 V
Max Charging Voltage 25.2 V
Battery Type LiPo 6S
Energy 44.4 Wh@0.5C
Discharge Rate Standard: 10C
Weight 295 g
Charging Temperature 5° to 40° C (41° to 104° F)
Max Charging Power 90 W
Charger Output

Battery charging interface: 
25.2 V ± 0.1 V
3.57 A ± 0.1 A (high current)

1 A ± 0.2 A (low current)
USB Port: 5V/2A (×2)

Rated Power 90 W

mappings between Java bean types with MapStruct like a pro!

MapStruct is a code generator that greatly simplifies the implementation of mappings between Java bean types based on a convention over configuration approach. The generated mapping code uses plain method invocations and thus is fast, type-safe and easy to understand.

MapStruct is an annotation processor which is plugged into the Java compiler and can be used in command-line builds (Maven, Gradle etc.) as well as from within your preferred IDE.

Multi-layered applications often require to map between different object models (e.g. entities and DTOs). Writing such mapping code is a tedious and error-prone task. MapStruct aims at simplifying this work by automating it as much as possible.

In contrast to other mapping frameworks MapStruct doesn’t use reflection at runtime! but generates bean mappings at compile-time which ensures a high performance, allows for fast developer feedback and thorough error checking.

The following mapper example demonstrate some of the most useful features

@Mapper(imports = { LocalDateTime.class, LocalDate.class, UUID.class },
        uses = { AMapper.class,
                 BMapper.class},
        unmappedTargetPolicy = ReportingPolicy.ERROR) 
// ReportingPolicy.ERROR useful to never forget to map a
// properties in @MappingTarget, at compile time it
// will failed with a compilation error
public abstract class  {

 @Inject
 PersonMapper personMapper;

 // since UUID added to imports = {}
 @Mapping(target = "uuid", expression= "java(UUID.randomUuid())") 
 // if you don't add UUID to imports = {}
 @Mapping(target = "uuid", expression= "java(java.util.UUID.randomUuid())") 
 // normally you don't need to add these lines, mapstruct will 
 // map both fields automatically
 // but since my mapping method has 3 parameters, you need to 
 // append the source, here child.name
 @Mapping(target = "name", source = "child.name") 
 @Mapping(target = "vorname", source = "child.vorname")
 // if you don't want to map it to Adult target
 @Mapping(target = "age", ignore= true) 
 // mapstruct detect the type of a, and
 // will use AMapper automatically, you just need to add it to 
 @Mapping(target = "a", source = "child.value") 
 // mappping required default values or type
 // conversion will invoke annotated method
 @Mapping(target = "birthday", source = "dbay", qualifiedBy="dateToLocalDate") 
 public abstract void mapChildToAdult(Child child, Family family, 
                      @MappingTarget Adult adult);

 // here for the sake of example, different classes but 
 // same fields, no need to define anything
 public abstract void mapAddress(Address childAddress, 
                                 @MappingTarget AdultAdress adultAddress);
 
 @AfterMapping // keep the same signature as mapChildToAdult()
 protected void assembleModel(Child child, Family family, 
                              @MappingTarget Adult adult) { 
  // after mapChildToAdult() is completed, mapstruct
  // will call this method automatically
  // yes if needed you can use mapping method with 
  // not only a source and a target if needed.
   
  // you could validate the result in this method 
  // or map some part of the @MappingTarget Adult
  mapAddress(familly,getAddress(), adult.getAddress());
  // or use another mapper 
  personMapper.map(family, adult);
 }
 
 @Named("dateToLocalDate")
 dateToLocalDate(String value) {
  if (vaue == null) {
     return LocalDate.of(2000, 1, 1);
  } 
  return date.toInstant()
                .atZone(ZoneId.systemDefault())
                .toLocalDate();
 }

}

Writing a java mapper to convert something to an ENUM is straightforward thanks to ValueMappings. Here is an example how to map form a string value to an Enum.

@Mapper
public abstract class ColorMapper {
   @ValueMappings({
    @ValueMapping(target = "GREEN", source = "001"),
    @ValueMapping(target = "BLUE", source = "002"),
    // ...
    @ValueMapping(target = "UNKNOWN", source = MappingConstants.ANY_UNMAPPED)
   })
   public abstract Color mapString(String colorString);

   @InheritInverseConfiguration
   public abstract String mapEnum(Color color);

   // Validate String to ENUM mapping and log a LOW_ALARM in 
   // case the string couldn't be mapped
   @AfterMapping
   protected void validate(String colorString, @MappingTarget Color color) {
    if (color== Color.UNKNOWN) {
      System.err.println("Invalid Color found: " + colorString);
    }
   }
}

You could also map Java Enumeration to Enumeration

public enum OrderType { RETAIL, B2B, EXTRA, STANDARD, NORMAL }

public enum ExternalOrderType { RETAIL, B2B, SPECIAL, DEFAULT }

@ValueMappings({
    @ValueMapping(source = "EXTRA", target = "SPECIAL"),
    @ValueMapping(source = "STANDARD", target = "DEFAULT"),
    @ValueMapping(source = "NORMAL", target = "DEFAULT")
 })
 ExternalOrderType orderTypeToExternalOrderType(OrderType orderType);

Embedded MongoDB provide a platform neutral way for running mongodb in Java unittests.

Thanks to this java library you can easily run integration test against a real mongo database. It is best to always mock your dependencies in true unit tests, but sometimes you need to test against the real thing.

  • It will
    • download mongodb (and cache it)
    • extract it (and cache it)
    • java uses its process api to start and monitor the mongo process
    • you run your tests
    • java kills the mongo process

How to use it in your unit tests

Add the dependencies to your project

<dependency>
    <groupId>de.flapdoodle.embed</groupId>
    <artifactId>de.flapdoodle.embed.mongo</artifactId>
    <version>2.2.0</version>
    <scope>test</scope>
</dependency>

One way to ease the integration is to define your own annotation in MongoDbTest.java

import org.junit.jupiter.api.extension.ExtendWith;
import java.lang.annotation.ElementType;
import java.lang.annotation.Retention;
import java.lang.annotation.RetentionPolicy;
import java.lang.annotation.Target;
@Target(ElementType.TYPE)
@Retention(RetentionPolicy.RUNTIME)
@ExtendWith({
        MongoDbCallback.class
})
public @interface MongoDbTest {
}

And the following MongoDbCallback.java

public class MongoDbCallback implements BeforeAllCallback {
    private static MongodExecutable mongo;
    @Override public void beforeAll(ExtensionContext context) throws Exception {
        if (MONGO != null) {
            System.out.println("MongoDB already up and running");
        } else {
            var version = Version.Main.V4_0;
            var port = 27000;
            var config = new MongodConfigBuilder()
                    .version(version)
                    .net(new Net(port, Network.localhostIsIPv6()))
                    .build();
            mongo = MongodStarter.getDefaultInstance().prepare(config);
            mongo.start();
            System.out.println("Mongo started {} on port {}", version, port);
        }
    }
}

You can now annotate your integration test with @MongoDbTest and use the mongoClient connected to localhost:27000

Other ways to use Embedded MongoDB

Install MongoDB High Availability on Microsoft Azure

https://azure.microsoft.com/en-us/

Microsoft Azure, commonly referred to as Azure, is a cloud computing service created by Microsoft for building, testing, deploying, and managing applications and services through Microsoft-managed data centers. 

Azure offer CosmosDB and Cloud Atlas:

Azure Cosmos DB is Microsoft’s globally distributed, multi-model database service. With a click of a button, Cosmos DB enables you to elastically and independently scale throughput and storage across any number of Azure regions worldwide. You can elastically scale throughput and storage, and take advantage of fast, single-digit-millisecond data access using your favorite API including: SQL, MongoDB, Cassandra, Tables, or Gremlin.

MongoDB Atlas is the global cloud database service for modern applications.
Deploy fully managed MongoDB across AWS, Google Cloud, and Azure with best-in-class automation and proven practices that guarantee availability, scalability, and compliance with the most demanding data security and privacy standards.

But you may still want to manage your own MongoDB cluster on Azure.

Creating Virtual machines

Firstly, You will create VMs, at least 3, ideally in a different zone but sharing the same virtual network.

The primary receives all write operations. While Secondaries replicate operations from the primary to maintain an identical data set. Because of that Secondaries may have additional configurations for special usage profiles.

I recommend you create also dedicated recovery services vaults to backup your cluster. The default backup policy is an Hourly backup, retained for 30 days.

Go to Virtual machines Use start with a preset

  1. Select a workload environment: Use Production
    • Boot diagnostics
    • High availability
    • Azure backup (where available)
  2. Select a workload type: useGeneral purpose (D-Series) default
  3. Availability Options: Availability set
  4. Availability set: To provide redundancy to your application, we recommend that you group two or more virtual machines in an availability set. This configuration ensures that during a planned or unplanned maintenance event, at least one virtual machine will be available and meet the 99.95% Azure SLA. The availability set of a virtual machine can’t be changed after it is created.
  5. I prefer Ubuntu, but CentOS is also good
  6. For production don’t use Azure Spot Instance! You do not want
  7. Attach additional disks for the mongodb data, ideally SSD, Don’t use Ultra disk, as they don’t support Azure Backup and encryption today (you could but will have to implement your own Bacula/xxx backup method)
  8. Activate Os Guest Diagnostics and all other options fitting to your use case
  9. Do not assign public IP except maybe for the primary. And even you could avoid this and still access though a Azure load Balancer or dedicated small VM in the same virtual network (= jump station)

Installing MongoDB on each VM

Secondly, we update the operating system (Ubuntu) and mount the external disk permanently.

sudo apt update && sudo apt upgrade -y

# locate the external disk
lsblk -o NAME,HCTL,SIZE,MOUNTPOINT | grep -i "sd"
# Here it is scd for me
# Partition the new disc with XFS
sudo parted /dev/sdc --script mklabel gpt mkpart xfspart xfs 0% 100%
sudo mkfs.xfs /dev/sdc1
sudo partprobe /dev/sdc1

# Add some folder on it
sudo mkdir /datadrive
sudo mount /dev/sdc1 /datadrive

# Mount and add to fstab to remount automatically at reboot, found its UUID
sudo blkid

# and add it to fstab
sudo vi /etc/fstab
UUID=300d0d47-ca5d-43ce-ba62-6f123fcbabb6   /datadrive   xfs   defaults,nofail   1   2

Install MongoDB, set data folder and replica name.

wget -qO - https://www.mongodb.org/static/pgp/server-4.4.asc | sudo apt-key add -
echo "deb [ arch=amd64,arm64 ] https://repo.mongodb.org/apt/ubuntu bionic/mongodb-org/4.4 multiverse" | sudo tee /etc/apt/sources.list.d/mongodb-org-4.4.list
sudo apt-get update && sudo apt-get install -y mongodb-org

# some more directories
sudo mkdir -p /datadrive/data
sudo chown -R mongodb /datadrive/

# time to tell mongoDB where the Data, Logs are
# adapt to match below values
sudo vi /etc/mongod.conf
 port = 27017
 bindIp: 0.0.0.0
 dbpath = /datadrive/data
 logpath = /datadrive/mongod.log

replication:
  replSetName : mongors

Start Mongo DB using systemD.

sudo service mongod start
sudo tail --f /datadrive/mongod.log

The “waiting for connections” message in the log file indicates mongod is up and running and waiting for client connections

Configure the replicas

Check first that the primary VM can connect to all secondaries using their private IP (telnet ip1/ip2/ip3 27017)

On the future primary VM, run mongo –port 27017

> conf = {
   _id : "mongors",
   members : [
     {_id:0, host:"10.2.0.4:27017"},
     {_id:1, host:"10.2.0.5:27017"},
     {_id:2, host:"10.2.0.6:27017"}]}
> rs.initiate(conf)

This will start the initialization of the mongodb replica set. Type the command rs.status() to check the status of the replica set. Upon successful initialization, you should see 1 of the 3 instances being the “Primary” of the set and the other 2 being the “Secondaries”

Moreover don’t forget to configure Azure monitoring (insights), Alerts, Disaster recovery, ….

Install RabbitMQ on Microsoft Azure

RabbitMQ is an open-source message-broker software that originally implemented the Advanced Message Queuing Protocol and has since been extended with a plug-in architecture to support Streaming Text Oriented Messaging Protocol, MQ Telemetry Transport, and other protocols.

RabbitMQ is the most widely deployed open-source message broker. Message brokers are a communication technology used for applications to communicate between them. They act as an intermediary platform when it comes to processing communication between two or more applications.

https://azure.microsoft.com/en-us/

Microsoft Azure, commonly referred to as Azure, is a cloud computing service created by Microsoft for building, testing, deploying, and managing applications and services through Microsoft-managed data centers. 

Bitnami is offering a ready to use deployment to ease the installation

  • Go to Azure marketplace
  • Search for RabbitMQ Cluster
  • Click Create
  • Basics
    • Resource group:
    • Region: choose a region
    • Deployment name: choose a deploymentname. e.g. rabbitmq
    • Save the application password carefully, it wont be displayed again.
    • Number of Slave machine: 2 or more is recommended
  • Environment Configuration
    • Authentification Type: password or shh
    • Save the Authentification password carefully, it wont be displayed again.
  • Click create

Wait a bit till all 3 VM’s created. One acting as a master and 2 as slaves in the example above. The names of each VM will be your Deployment name followed by a number. E.g. rabbitmq1, rabbitmq2, rabbitmq3. These VM will be visible under the Virtual machine page.

Note that an IP will be assigned only to a master VM by default. You can choose to assign IP’s to the other VM’s if you intend to access them independently. Also by default SSH will be enabled on port 22 for all VM’s.

Accessing the master VM

Head up to master VM, Settings – Connect menu. Azure display the SSH command to use. E.g like

ssh -i <private-key-path> bitnami@xxxxxxxx-vm0.region.cloudapp.azure.com

You can now connect to the master. You may want to install the RabbitMQ management panel on that node by running:

sudo rabbitmq-plugins enable rabbitmq_management

Accessing RabbitMQ Administration panel

It is recommended to access the RabbitMQ management panel through an SSH tunnel, so just add to the previous SSH a tunnel on port 15672

ssh -i <private-key-path> bitnami@xxxxxxxx-vm0.region.cloudapp.azure.com -L 15672:127.0.0.1:15672

You can now access the RabbitMQ management using your browser at http://localhost:15672/

Monitoring

It is recommended to configure properly Microsoft insights and alerts on each VM

Interesting paths and command

sudo vi /opt/bitnami/rabbitmq/etc/rabbitmq/rabbitmq.config
sudo service bitnami start
sudo service bitnami stop
sudo rabbitmqctl cluster_status

Links

SNK Neo Geo MVSX Home Arcade

The Gstone MVSX Home Arcade will include 50 legendary and popular titles from various NEOGEO Series such as THE KING OF FIGHTERS, FATAL FURY, SAMURAI SHODOWN and METAL SLUG.

Gstone Group, working closely with SNK, has announced the SNK NEOGEO MVSX home arcade system featuring 50 classic SNK NEOGEO titles releasing in North America in November 2020 with 10 built-in languages.

The SNK NEOGEO MVSX will be the ultimate home arcade for fans of classic SNK titles as it will include both the MVS arcade and the AES home versions of games from fan-favorite series like The King of Fighters, Metal Slug, Fatal Fury, Samurai Shodown, Art of Fighting and sports titles including Baseball Stars Professional and Top Player’s Golf. The games are all housed within a stylish tabletop arcade with an attached base that has a 17-inch 4:3 LCD screen and has two-player support with analog joysticks and buttons. Fans of the classic SNK NEOGEO MVS arcade machines are sure to love the tabletop arcade’s aesthetics as it’s decked out in red and white, has familiar button placements (such as the “SELECT GAME” button) and has its signature marquee showcasing beautiful box art for the most popular franchises of the 50 games.

Preorders for the SNK MVSX will begin September 2020. The tabletop arcade will officially launch in November 2020 under GStone Group’s UNICO brand. A base will also be available for sale which will transform the tabletop arcade into a nearly 5-foot-tall full-sized arcade cabinet

MVSX size

About Gstone Group

Established in 2004 from a love of retro games Gstone Group was started with a focus on gaming and has a rich experience in consoles, joysticks, tabletop boxes, handhelds and arcade products. With our skill and knowledge we provide the best user experience and game experience for our products, and most importantly, for our customers. More information about the SNK MVSX can be found at: http://www.snkmvsx.com

About SNK Corporation

Headquartered in Osaka, Japan, SNK CORPORATION (SNK) develops, publishes, and distributes interactive entertainment software in Japan, North America, Europe and Asia. Founded in 1978, SNK is one of the largest privately held interactive entertainment content providers in the world.

Known for such franchises as THE KING OF FIGHTERS, METAL SLUG, and SAMURAI SHODOWN, SNK continues to be an industry leader by focusing on its rich arcade history. More information on SNK CORPORATION can be found at http://www.snk-corp.co.jp

Accessing Git and Nexus with custom SSL certificates

Again and again I work for companies having self crafted certificate. In 2020 there is no excuse to not use a valid certificate. There is now Let’s encrypt free certificates https://certbot.eff.org/

Here are some solutions how to fix this for Git, Nexus, maven and Java

Git

Bad solution

Is to avoid SSL certificate checks all together (from a security standpoint this is very bad)

git config --global http.sslVerify false

Best option

Is to add the self-signed certificate to your certificate store, you need to obtain the server certificate tree using chrome or firefox.

  1. Navigate to be server address. Click on the padlock icon and view the certificates. Export all of the certificate chain as base64 encoded files (PEM) format.
  2. Add the certificates to the trust chain of your GIT trust config file In Git bash on the the machine running the job run the following:
git config --list

find the http.sslcainfo configuration this shows where the certificate trust file is located.

3. Copy all the certificates into the trust chain file including the "- -BEGIN- -" and the "- -END- -". Make sure you add the ROOT certificate Chain to the certificates file

Nexus

Bad option

You can also tell Apache Maven to accept the certificate even though it isn’t signed. invoke Maven MAVEN_OPTS with

-Dmaven.wagon.http.ssl.insecure=true

If the host name configured in the certificate doesn’t match the host name Nexus is running on you may also need to add in MAVEN_OPTS

-Dmaven.wagon.http.ssl.allowall=true

Best option

Install a real certificate in Nexus or Import the faulty certificate in your JDK cacert running

${JAVA_HOME}/bin/keytool -importcert -file waltercedric.pem -alias www.waltercedric.com  -storepass changeit -keystore ${JAVA_HOME}/jre/lib/security/cacerts

m-Clippy WON Migros Category prize in Europe’s Biggest Hackathon Hack Zurich 2020

Last weekend I took part in the biggest European Hackathon Hack Zurich 2020, and our team m-Clippy won in the Migros category!

Since 2014, HackZurich unites the world’s best tech talents, selected from thousands of applications, representing several elite universities and leading organizations from +85 countries, to collaborate and develop innovative web-, mobile- and hardware applications during a 40-hours hackathon in teams. Global industries and organizations provide the latest technologies, tools, and APIs to spark the creation of new prototypes. HackZurich is an unforgettable adventure that every tech-talent should experience at least once in their lifetime: A fun and unique opportunity to touch base with new technologies, innovative communities and career opportunities.

We decide (Lorenz Hänggi and I) to tackle the workshop challenge number 1, a day before. We went out on Friday 14:00 for a pizza brainstorming on this idea prior to the start of Hack Zürich at 17:00.

We both watched the 35 min Migros Workshop at 20:00

#1 LET’S CREATE DIGITAL PRODUCT TWINS
MIGROS
Imagine knowing in real time for every product what it consists of, where it comes from and how it got to the store and even what you can cook with it tonight. With the help of digital product twin, we create a digital ecosystem and give our customers, employees and suppliers a 360-degree view of the products. This information helps customers to make their shopping experience as simple as possible and to make their purchasing decisions easier for them. We supply a lot of interesting APIs and datasets (like Product Informations, shopping cart data, logistics data, store and shelf layouts to play around with) as well as access to Microsoft Azure Cloud Services (e.g. Spatial Anchors if you want to try something with AR) and Scandit Scan SDK (e.g. for barcode scanning). Furthermore, you’ll get support from our experts. We are excited to create a world full of digital product twins with you!

And we both were active in the Migros Slack channel. Thanks to some developers of Migros, we were exploring the APIs and asking some questions.

The vision

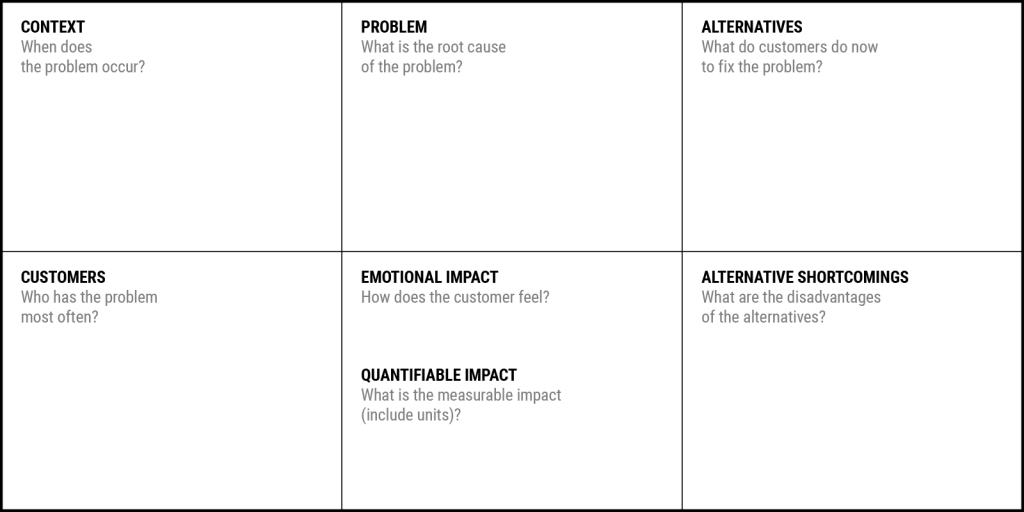
We started by filling up a Problem Canvas. A  Problem Canvas allows you to identify the customer, the problematic action, the improvement areas, the reasons for customer to switch and the risks of not switching, all in a single view. The number one cause of startup failure is the lack of a real need in the market, according to a recent post-mortem on startups

And we came up with the following idea:

We want to help people with allergies and people who wants to consume products in a sustainable way. We build an add-on to the Cumulus App and the Store-Scanner, later to alert in the Shop if a product is not healthy or not sustainable. Additionally you can check how good was your shopping cart with your preferences.

Designing the logo

We designed a logo. Note how we reuse the same color palette used by Migros 😉

Designing the iOS app

We start designing mockups using some iPhone wireframes. You can use this template (right click save – as)

Coding!

We started coding on Friday 18.09 18:00 PM, coding 14 hours in a row, sleeping 3 hours, then 24 hours non stop till Sunday 20.09 at 07:00. The last 2 hours before submission deadline were dedicated to:

  • Polish the application (mainly texts: typos, sentences),
  • Working on the pitch deck,
  • Recording a 2 minutes video of the app,
  • Collecting screenshots to complete the devPost profile of the app,
  • And submitting our application at 08:59 AM 🙂 1 minute before the deadline.

Our Pitch Deck:

Inspiration

Food intolerance or allergy is a significant and widespread medical problem. Food allergy can cause severe symptoms in sensitive individuals and may be life threatening. In many instances the offending food is easily identified however milder forms of food allergy may be more difficult to diagnose.

Food intolerance is a neglected area of medicine because of diagnostic difficulties, non-specific symptoms and the relatively mild nature of the resulting illness; however repeated irritation or inflammation of the gastrointestinal tract may have serious consequences including malabsorption syndromes, small bowel overgrowth, coeliac disease and bowel cancer.

Based on resarch from Migros around 2 millions people in Switzerland are suffering from food intolerances and allergies.

m-clippy is an extension to cumulus App that has access to all cumulus data of its customers shopping cart and products. Additionally the customer is able to enter his eat habits and preference and based on all this information m-clippy provides deep insights into your shopping behaviors.

m-clippy help everyone who has to stick to a restricted diet because of food intolerances or allergies. m-clippy supports consumers eating habits like

  • Bio,
  • vegan,
  • vegetarian, ….

but also support customers who want to eat more

  • National,
  • Regional or
  • outside Switzerland

and with m-clippy the customer can choose from up to 17 different allergens to get tips, insights and recommendations.

Future

Customer would get a visual or sound alerts on Migros scanner Subito and a realtime reports / tips in the cumulus. m-clippy displays for the customer, how good or how he/she can improve his/her consumer behaviors (=Gamification this would be also at this time that we can propose them more suitable and alternative products) and will get great recommendations

Our iOS app

Customers need to select their preferences in Migros cumulus app (intolerance, eating habits, allergens )

Customers get insights through recommendations, tips and alternative products based on the preferences.

How we built it

All submissions

You can browse all submissions at Hack Zurich 2020 in the gallery here https://hackzurich2020.devpost.com/project-gallery

The video

You see us at 1:41min receiving the Migros price

Special 35th Anniversary Super Mario Bros edition Game & Watch console available on Nov. 13 for 60$

Super Mario celebrates its 35th birthday. At the same time, the classic game Super Mario Bros. for the NES is 30 years old. Reason enough for Nintendo to celebrate its heroes with a new retro console in mini format.

Coming November 13 2020

This Game & Watch: Super Mario Bros. is a copy of the very first console that Nintendo brought to market 40 years ago. Just like the original from back then, a digital clock is integrated.

The console will include three games:

in piece of video game history – Game & Watch, Nintendo’s very first handheld console, was released in Japan in 1980. Now get a piece of video game history with this brand new model: a gold Game & Watch console that includes the original Super Mario Bros. game, a digital clock and more!

  • Super Mario Bros: Play Super Mario Bros. Game & Watch style! – Jump over deep chasms, jump on gumbas, and travel through tubes just like in the good old days, but with even more precise control thanks to the console’s control pad. Play alone or give the console to a friend to see who jumps, stomps and runs best!
  • Super Mario Bros: The Lost Levels (Or Super Mario Bros. 2 in Japan) is also included! If you want a short game for in-between, Ball in the special Super Mario look is just right.
  • Game & Watch: Ball (updated with Super Mario in it) a digital clock with 35 little touches. Time for fun – Depending on the time, the included digital clock plays 35 different animations. In some of them there are also Mario’s friends and opponents! Take a look at the clock when you’re not rushing to the rescue of Princess Peach!

Features

NameGame & Watch: Super Mario Bros.
Package contentsGame & Watch system + 30cm USB Cable type C-A
SizeHeight 67mm, Length 112mm, Depth 12.5mm
Weight.15 lbs
Internal batteryLithium Ion
Play timeApprox. 8 hours
Charging timeApprox. 3.5 hours

Price

It will go on sale for US$49.99 (S$68.22) on Nov. 13 and will be released in the US, UK and Japan.

The official site https://gameandwatch.nintendo.com/