Neo Geo Arcade Stick Pro Hacking

[et_pb_section fb_built=”1″ _builder_version=”4.4.3″][et_pb_row _builder_version=”4.4.3″][et_pb_column type=”4_4″ _builder_version=”4.4.3″][et_pb_text _builder_version=”4.4.3″ custom_padding=”||0px|||”]

It comes preloaded with 20 of SNKs best retro fighting games for you to choose from. Use a HDMI cable to attach your arcade stick Pro to your TV to play in Console mode. Hook up NEOGEO mini game pads for some multiplayer action. The arcade stick Pro also has the ability to connect to your computer, a NEOGEO mini or an Android device to unlock even more ways to use this unique device. You also have the ability to rearrange the buttons.

[/et_pb_text][et_pb_image src=”https://www.waltercedric.com/wp-content/uploads/2020/04/Neogeo-Arcade-Stick-Pro-3.png” url=”https://amzn.to/3cAhRqO” _builder_version=”4.4.3″][/et_pb_image][et_pb_text _builder_version=”4.4.3″]

Love classic SNK fighting games? This is the Console for you. Comes preloaded with 20 of best retro fighting games for you to choose from. Use a HDMI cable to attach your arcade stick Pro to your TV to play in Console mode. You have the option to hook up NEOGEO mini game pads for some multiplayer action. The arcade stick Pro also has the ability to connect to your computer, a NEOGEO mini or an Android device and act as a Controller for your games on these systems to unlock even more ways to use this unique device. The joystick is a SNK electrostatic style unit to really give you the precise movements. You also have the ability to rearrange the buttons to your liking to really make this a One of a kind video game system!

[/et_pb_text][et_pb_image src=”https://www.waltercedric.com/wp-content/uploads/2020/04/Neogeo-Arcade-Stick-Pro-4.png” url=”https://amzn.to/3cAhRqO” _builder_version=”4.4.3″][/et_pb_image][et_pb_text _builder_version=”4.4.3″]

My quick review

The emulation runs a lot smoother on this than the mini and it outputs at a higher resolution (720p). You can also use it as a controller for your Sony PS3 or PC. 

Yes you can add more games to it! by hacking it 😉 By default there is 27 fighters, 3 sports and 10 action games (including all Metal Slug)

 You can also use this purely as a fight stick and plug it in to consoles or PC which is nice. buttons can be swapped easily for Sanwa

You must buy an HDMI cable and a power supply (USB 5V) to play on a HDTV.  The unit is powered by usb type C. 

18 more games will be unlocked for free, just visit https://www.snk-corp.co.jp/us/neogeoarcadestickpro/upgrade/

[/et_pb_text][/et_pb_column][/et_pb_row][et_pb_row _builder_version=”4.4.3″][et_pb_column type=”4_4″ _builder_version=”4.4.3″][et_pb_image src=”https://www.waltercedric.com/wp-content/uploads/2020/04/Neogeo-Arcade-Stick-Pro-1.png” url=”https://amzn.to/3cAhRqO” _builder_version=”4.4.3″][/et_pb_image][/et_pb_column][/et_pb_row][et_pb_row _builder_version=”4.4.3″][et_pb_column type=”4_4″ _builder_version=”4.4.3″][et_pb_text _builder_version=”4.4.3″]

How to add games to the SNK NEOGEO Arcade Stick Pro

[/et_pb_text][et_pb_text _builder_version=”4.6.0″ hover_enabled=”0″ sticky_enabled=”0″]

  1. Download ROM from https://t.me/NeoGeoCFW. you need to install Telegram

  2. Copy 3 files to the memory stick root.

  3. Insert the memory stick to the SNK NEOGEO Arcade Stick Pro

  4. Go to the Setting, then System, choose the System upgrade. The Arcade Stick Pro will search for an upgrade file automatically.

  5. The upgrade file will be available. Click the confirm button.

  6. Restarting to upgrade. Upgrading takes around 20 minutes. Do not power off the Stick to avoid potential risk.

  7. Then you will see the application selection. Go for NEOGEO Hack.

[/et_pb_text][/et_pb_column][/et_pb_row][et_pb_row _builder_version=”4.4.3″][et_pb_column type=”4_4″ _builder_version=”4.4.3″][et_pb_image src=”https://cedricwalter.files.wordpress.com/2021/12/3241f-neogeo-arcade-stick-pro-5.png” url=”https://amzn.to/3cAhRqO” _builder_version=”4.4.3″][/et_pb_image][/et_pb_column][/et_pb_row][/et_pb_section][et_pb_section fb_built=”1″ _builder_version=”4.4.3″][et_pb_row _builder_version=”4.4.3″ global_module=”13251″][et_pb_column type=”4_4″ _builder_version=”4.4.3″][et_pb_text _builder_version=”4.4.3″ _dynamic_attributes=”content” text_font=”|600|||||||” text_text_color=”#0C71C3″ text_font_size=”17px” link_text_color=”#000000″ link_font_size=”25px” link_letter_spacing=”2px”]@ET-DC@eyJkeW5hbWljIjp0cnVlLCJjb250ZW50IjoicG9zdF90YWdzIiwic2V0dGluZ3MiOnsiYmVmb3JlIjoiUmVsYXRlZCBUb3BpY3M6IiwiYWZ0ZXIiOiIiLCJsaW5rX3RvX3Rlcm1fcGFnZSI6Im9uIiwic2VwYXJhdG9yIjoiLy8iLCJjYXRlZ29yeV90eXBlIjoicG9zdF90YWcifX0=@[/et_pb_text][/et_pb_column][/et_pb_row][/et_pb_section]

Ubuntu 20.04 Release Date & Planned Features

[et_pb_section fb_built=”1″ admin_label=”section” _builder_version=”3.22″][et_pb_row admin_label=”row” _builder_version=”3.25″ background_size=”initial” background_position=”top_left” background_repeat=”repeat”][et_pb_column type=”4_4″ _builder_version=”3.25″ custom_padding=”|||” custom_padding__hover=”|||”][et_pb_text admin_label=”Text” _builder_version=”3.27.4″ background_size=”initial” background_position=”top_left” background_repeat=”repeat”]

Ubuntu 20.04 LTS is due to be released on April 23, 2020! Again this LTS release will feature a number of iterative improvements, usability and user interface refinements, and some much needed updates.

For now the 20.04 BETA is available HERE or you can also upgrade before (not recommended) or better after the 23 April with

sudo do-release-upgrade -d

The best is really to wait a bit more, assuming your system is fully up-to-date, You will be notified that an update is available via a dialog!

  • Linux Kernel 5.4
  • PHP 7.4
  • Shows OEM vendor logo during boot
  • Boot speed improvements
  • New dark theme option
  • GNOME 3.36
  • Improved performance
  • Redesigned login and lock screens
  • Snap-based Ubuntu Software app
  • Improved GNOME Shell performance
  • Improved ZFS support
  • Fractional scaling toggle
[/et_pb_text][/et_pb_column][/et_pb_row][/et_pb_section][et_pb_section fb_built=”1″ _builder_version=”4.4.3″][et_pb_row _builder_version=”4.4.3″ global_module=”13251″ saved_tabs=”all”][et_pb_column _builder_version=”4.4.3″ type=”4_4″][et_pb_text _builder_version=”4.4.3″ _dynamic_attributes=”content” hover_enabled=”0″ text_font=”|600|||||||” text_text_color=”#0C71C3″ text_font_size=”17px” link_text_color=”#000000″ link_letter_spacing=”2px” link_font_size=”25px”]@ET-DC@eyJkeW5hbWljIjp0cnVlLCJjb250ZW50IjoicG9zdF90YWdzIiwic2V0dGluZ3MiOnsiYmVmb3JlIjoiUmVsYXRlZCBUb3BpY3M6IiwiYWZ0ZXIiOiIiLCJsaW5rX3RvX3Rlcm1fcGFnZSI6Im9uIiwic2VwYXJhdG9yIjoiLy8iLCJjYXRlZ29yeV90eXBlIjoicG9zdF90YWcifX0=@[/et_pb_text][/et_pb_column][/et_pb_row][/et_pb_section]

Ninebot KickScooter MAX G30D

The Segway MAX G30D is specially designed for Switzerland and Germany and complies with traffic regulations. The best choice for a high quality and comfortable driving experience. The scooter has a particularly long range, up to 65km. The tubeless pneumatic tires help you to achieve greater riding comfort and the LED lights at the front and rear, the reflectors and the bell offer you the greatest safety when driving.

  • First street-legal KickScooter in its class with ABE approval
  • Serial number and integrated holder for the warranty sticker available
  • Maximum speed is 20 km/h*
  • Range up to approx. 65 km, top performance in this class**
  • 10 inch tubeless pneumatic tires for a smooth ride
  • Built-in charger for fast charging
  • Can climb up to 20 % gradient road
  • Dual and regenerative braking system for increased safety and stability
  • Water resistance IPX5 for the frame (IPX7 water resistance for the core components)
  • Loud bell for pressing and side reflectors for increased safety on busy roads

What to do first

  1. Mount the handlebars – check and retighten all screws
  2. Activate the scooter. Do not charge the scooter when trying to activate: it wont work 🙂
    1. Install and register in the Ninebot app (iOS or Android) or login with an existing account.
    2. Switch on the scooter.
    3. The Bluetooth icon (ready for connection) lights up and you should hear a bip-bip sound.
    4. Click on “Vehicle” – “Scan for Vehicle” and connect to the scooter.
    5. A successful connection is confirmed with a beep. The Bluetooth symbol then lights up continuously.
  3. Follow the instructions in the app, it is recommended to follow the 2min tutorial.
  4. Do not install or update to the latest firmware, this will limit your capabilities to install custom firmware.

What to do regularly

Check and retighten all screws

Check and control tires pressures

You areFront TireRear Tire
50-70 kg30-40 psi or 2 to 2.8 bar40 – 50 psi or 2.8 to 3.5 bar
70-90 kg40-45 psi or 2.8 to 3.1 bar45 – 55 psi or 3.1 to 3.8 bar
90-100 kg45-50 psi or 3.1 to 3.4 bar50 – 55 psi or 3.4 to 3.8 bar
100 kg +50-60 psi or 3.5 to 4.2 bar60-65 psi or 4.1 to 4.5 bar

What to buy next

install fenders

Segway Ninebot  Front Bag

Available in 2, 2.5, 3 or 4 liters size, rain resistant

Enable 1200 mw Mode on DJI FPV System

[et_pb_section fb_built=”1″ _builder_version=”3.22″][et_pb_row _builder_version=”3.25″ background_size=”initial” background_position=”top_left” background_repeat=”repeat”][et_pb_column type=”4_4″ _builder_version=”3.25″ custom_padding=”|||” custom_padding__hover=”|||”][et_pb_text _builder_version=”3.27.4″ background_size=”initial” background_position=”top_left” background_repeat=”repeat”]

NOTES

  • You should follow your local regulations regarding which mode to use.
  • Long term hardware effects are unknown
  • You get more or less 30% more range
  • Your system must be already in FCC mode
  • Enable Power Limit as it add some protections against overheating.

  • Create a .txt file, name it naco_pwr.txt
  • Type pwr_2 or pwr_1
    • pwr_1 = 1000 mW
    • pwr_2 = 1200 mW & 1000 mW
  • Save and close
  • Copy naco_pwr.txt to an SD card
  • Put SD card in DJI goggles
  • Power on Goggles and Air Unit

 Now in the Goggles menu, under Settings -> Device, you should be able to select 1200 mW or 1000 mW

[/et_pb_text][/et_pb_column][/et_pb_row][et_pb_row _builder_version=”4.4.3″ global_module=”13251″][et_pb_column type=”4_4″ _builder_version=”4.4.3″][et_pb_text _builder_version=”4.4.3″ _dynamic_attributes=”content” text_font=”|600|||||||” text_text_color=”#0C71C3″ text_font_size=”17px” link_text_color=”#000000″ link_font_size=”25px” link_letter_spacing=”2px”]@ET-DC@eyJkeW5hbWljIjp0cnVlLCJjb250ZW50IjoicG9zdF90YWdzIiwic2V0dGluZ3MiOnsiYmVmb3JlIjoiUmVsYXRlZCBUb3BpY3M6IiwiYWZ0ZXIiOiIiLCJsaW5rX3RvX3Rlcm1fcGFnZSI6Im9uIiwic2VwYXJhdG9yIjoiLy8iLCJjYXRlZ29yeV90eXBlIjoicG9zdF90YWcifX0=@[/et_pb_text][/et_pb_column][/et_pb_row][/et_pb_section]

Enable FCC Mode on DJI FPV System (700mw 8 Channels)

In CE mode, the maximum output is limited to 25 mW, and there are only 4 channels available, while in FCC mode those numbers are increased to 700 mW and 8 channels. 

NOTE that you should follow your local regulations regarding which mode to use.

How to switch to FCC mode from CE mode

  • Take the micro SD Card out of the Air Unit
  • Create a text file on the root directory, name it naco.txt
  • Write 1 in the file, which means FCC mode for USA or any other number according to this list:
    • 1 – FCC mode for US, 8 Channels
    • 2 – FCC mode for Canada 4 Channels
    • 3 – HK CE 4 Channels
    • 4 – CN SRRC 4 Channels
    • 5 – JP Japan 3 Channels
    • 6 – KR Korea 4 Channels
    • 7 – BR Brazil 4 Channels
    • 8 – FR CCA 4 Channels
  • Insert SD card in the Air Unit
  • Power up goggles, and then Air Unit

 in the Player menu you should see now 8 channels.

Attention updating the firmware on your DJI FPV goggles and Air Unit will always reset the power setting back to the default settings according to your region!

Grimsel Pass

The Grimsel Pass (German: Grimselpass; French: Col du Grimsel; Italian: Passo del Grimsel) is a mountain pass in Switzerland, crossing the Bernese Alps at an elevation of 2,164 metres (7,100 ft). The pass connects the Haslital, the upper valley of the river Aare, with the upper valley of the Rhône. In so doing, and as the Aare is a tributary of the Rhine, the pass crosses the continental divide between the North Sea and the Mediterranean Sea.

A paved road follows the pass, running 38 kilometres (24 mi) from Gletsch to Meiringen. The road is normally closed between October and May, due to the high snowfall on the pass. As it is the only direct road pass between the cantons of Bern and Valais across the Bernese Alps, attempts are made to keep the road open as long as possible with snow ploughs. A PostBus Switzerland service uses the pass several times a day, connecting Meiringen and Oberwald. Wikipedia

You may also want to drive through the Furkapass, Sustenpass

Visited in 2018, 2019, …

Furkastrasse
Furkastrasse
Räterichsbodensee in the background of the image.
The Grimselsee or Lake Grimsel is an artificial lake near the Grimsel Pass in the Canton of Berne, Switzerland.
The Lake Grimsel (Grimselsee) is an artificial lake near the Grimsel Pass in the Canton of Berne, Switzerland. With a volume of 95 mio m³, it is larger than other hydroelectric reservoirs in the region: Oberaarsee, Räterichsbodensee and Gelmersee. The dam was completed in 1932 and is operated by Kraftwerke Oberhasli AG (KWO). It is located in the municipality of Guttannen. Altitude 1,908 m
Grimselsee in the front, Räterichsbodensee in the back of the image.
Lake Grimsel (Grimselsee) in the front, Räterichsbodensee in the back of the image.
Totensee, view from a restaurant terrace.

Furka Pass

Furka Pass (French: Le Col de la Furka), with an elevation of 2,429 metres (7,969 ft), is a high mountain pass in the Swiss Alps connecting Gletsch, Valais with Realp, Uri. The Furka Oberalp Bahn line through the Furka Tunnel bypasses the pass. The base tunnel opened in 1982 and replaced a tunnel at 2100 m.

The Furka Pass was used as a location in the James Bond film Goldfinger. One curve on the east side of the pass is even named “James Bond Strasse”. At the sign, there is a lookout point with a small parking area. Visitors can also park next to Hotel Belvédère, close to the top of the pass on the west side, and take the short walk to the Rhone Glacier Ice Grotto. The glacier moves 30-40 meters a year and the 100 m long tunnel and ice chamber can be visited from June when the road opens. Wikipedia

I personally prefer Susten Pass for its scenic road.

Visited in 2018, 2019, 2020..

View 20 meters below Hotel Belvédère.

Susten Pass

Susten Pass (German: Sustenpass) is a mountain pass in the Swiss Alps. The pass road, built from 1938–1945, connects Innertkirchen in the canton of Bern with Wassen in the canton of Uri. A 300-metre long tunnel crosses the pass at 2,224 metres.

The pass is popular with tourists, by car, motorbike or bicycles especially for the views of the Stein Glacier on the south side. There are numerous great views and a number of places to stop for photos. The views are stunning.

It’s my favorite road if you compare it to Furkapass, Grimselpass.

on the road to sustenpass
Sustenpass Highlights

Pictures June 2018-2019

Cryptocurrency monitor with Unicorn HAT

Unicorn pHAT and HAT. 32 or 64 blinding ws2812 pixels for your Raspberry Pi. it is called Unicorn Hat because it does rainbows, really bright rainbows! ATTENTION: do not stare directly at the led without a sheet of paper on it. LED are REALLY bright!

Shopping list

You need obviously a raspberry pi, ideally with WIFI build in if you don’t like cables

  • Raspberry Pi 1 is not supported by Unicorn Hat
  • Raspberry pi 2 , dual core, will require an Ethernet cable, can still be found on ebay, graiglist. Consume half the power of a PI 3 or 4
  • Raspberry pi 3 or 4, quad core, a bit a shame to use this amount of power for that task, but has built in WIFI!

and a Unicorn HAT from https://shop.pimoroni.com/products/unicorn-hat I’ve got mine used in flea market 🙂

Unicorn HAT Features

  • It works on Raspberry pi 4, 3+, 3, 2, A+ and Zero
  • 64 RGB LEDs (WS2812B)
  • LED data driven via DMA over PWM
  • Unicorn HAT pinout
  • Compatible with all 40-pin header Raspberry Pi models
  • Python library
  • Comes fully assembled
  • Warning: WS2812 LEDs are bright enough to cause eye pain, do not look at them directly when brightly lit. is recommended to use a diffuser.
  • Photo-sensitivity warning: flashing, strobing, and patterns of lights may cause epileptic seizures. Always take care and immediately stop using if you feel unwell (dizziness, nausea, affected vision, eye twitching, disorientation).
  • Power: Unicorn HAT requires a >2A microUSB power supply for your Pi.

BUILDING THE SD CARD

Raspbian is THE official operating system for all models of the Raspberry pi.

Raspbian is a Debian-based (32 bit) computer operating system for Raspberry Pi. There are several versions of Raspbian including Raspbian Buster and Raspbian Stretch. Since 2015 it has been officially provided by the Raspberry Pi Foundation as the primary operating system for the family of Raspberry Pi single-board computers.

Wikipedia

We now use the Raspberry Pi Imager for an easy way to install Raspbian and other operating systems to an SD card ready to use with your Raspberry Pi:

Choose Raspbian (other), then lite version connect HDMI, Keyboard, mouse (and network cable or you can use WIFI)

Add a new file ‘ssh’ to the first partition, to enable ssh. Boot the PI and connect to the console.

Installation

Install Unicorn HAT

# Unicorn Hat is easy to set up, from https://github.com/pimoroni/unicorn-hat
curl -sS https://get.pimoroni.com/unicornhat | bash

Install the software

We use the project Unicorn-scroller and modify it to support querying the Coingecko free API

CoinGecko is a cryptocurrency ranking web site that provides 360 degree overview of the standing of digital currencies. The cryptocurrency ranking is quantitatively and qualitatively evaluated based on public data collected from the internet. Metrics considered include market capitalization, liquidity, developer activity, community, and public interest.

https://www.coingecko.com/

I did open a Pull Request at https://github.com/sconemad/unicorn-scroller/pull/6 as long as it is not merged into unicorn-scroller, we will use my fork

sudo apt-get install git python-pip libfreetype6-dev python-imaging python-feedparser fortune-mod -y
sudo pip install Pillow, pyephem, pycoingecko

# a pull request has been opened https://github.com/sconemad/unicorn-scroller/pull/6
# in between use my fork
git clone https://github.com/cedricwalter/unicorn-scroller.git
cd unicorn-scroller
git checkout cryptocurrencies

# get 8x8 True Type font, from /home/pi/unicorn-scroller
wget -O font.zip https://dl.dafont.com/dl/?f=minecraftia
unzip font.zip

# delete all in  /home/pi/unicorn-scroller/messages/ except bitcoin and ethereum
ln -s bitcoin 01-00
or 
ln -s ethereum 01-00

# run to test
sudo ./unicorn-scroller.py

Run at boot time

To run on system boot, add the following to /etc/rc.local (before the “exit 0” line at the end):

(cd /home/pi/unicorn-scroller && python unicorn-scroller.py)&

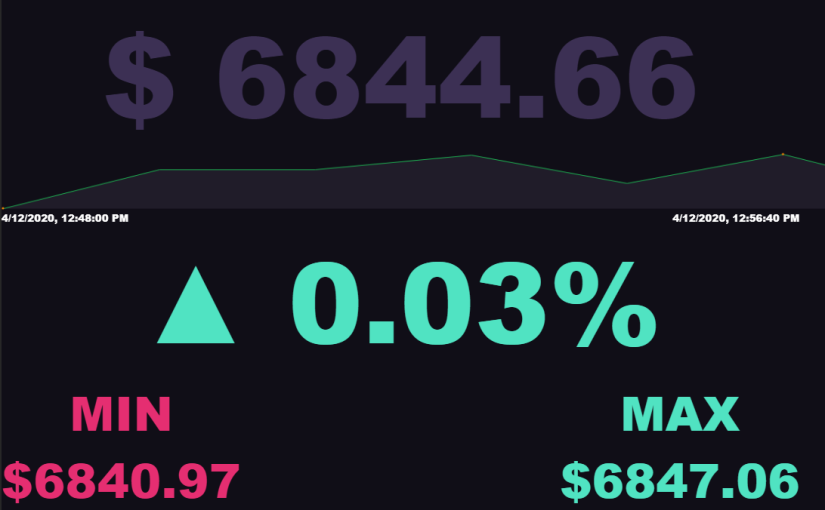
Bitcoin, Ethereum price Monitoring on your raspberry Pi

All credit goes to Author

My setup use

  • Nginx instead of Apache
  • An easier setup, with less steps
  • You can display Bitcoin, Ethereum or any other cryptocurrencies (request)
  • I also provide a ready to use image

Shopping list

You need obviously a raspberry pi, ideally with WIFI build in if you don’t like cables

  • Raspberry pi 1, single core, will require an Ethernet cable
  • Raspberry pi 2 , dual core, will require an Ethernet cable
  • Raspberry pi 3 or 4, a bit a shame to use this amount of power for that task, but has built in WIFI

A 3.5” LCD screen from Amazon

Installing the Software

Your SD-card needs to contain the software. You can take the long road by building the SD-card image yourself or use the already prepared SD-Card image:

Download SD-Card image – Version 1.0: SOON

SHA-256: xxxxxxxxxxx

Write the SD-Card image to your SD Card

You need to write the downloaded SD card image (the img.gz-file) to your SD card (16 GB minimum) – you can use the very easy tool Balena Etcher for this: https://www.balena.io/etcher/ .. it’s available for Win, Mac & Linux.

Insert the SD card and connect the power plug.

  • Make sure to connect the raspberry with a LAN cable to the internet at this point.
  • Make sure that your laptop and the raspberry are on the same local network.

BUILDING THE SD CARD

Raspbian is THE official operating system for all models of the Raspberry Pi.

Raspbian is a Debian-based (32 bit) computer operating system for Raspberry Pi. There are several versions of Raspbian including Raspbian Buster and Raspbian Stretch. Since 2015 it has been officially provided by the Raspberry Pi Foundation as the primary operating system for the family of Raspberry Pi single-board computers.

Wikipedia

We now use the Raspberry Pi Imager for an easy way to install Raspbian and other operating systems to an SD card ready to use with your Raspberry Pi:

Choose Raspbian Desktop (recommended), connect HDMI, Keyboard, mouse (and network cable or you can use WIFI)

Add a new file ‘ssh’ to the first partition, to enable ssh

Installation

Set up nginx web server on the Raspberry Pi

sudo apt-get update
# we need PHP, a browser, and we will deactivate the screensaver
sudo apt-get install nginx php7.3-fpm php7.3-curl  chromium-browser xscreensaver -y

# start nginx
sudo systemctl restart php7.3-fpm

# we create one site, listening to localhost on port 80
sudo vi /etc/nginx/sites-available/default

server {
    listen 80 default_server;
    listen [::]:80 default_server;

    root /var/www/html;

    index index.php index.html index.htm index.nginx-debian.html;

    server_name [your public IP];

    location / {
        try_files $uri $uri/ =404;
    }

    location ~ \.php$ {
        include snippets/fastcgi-php.conf;
        fastcgi_pass unix:/var/run/php/php7.3-fpm.sock;
    }

    location ~ /\.ht {
        deny all;
    }
}

sudo nginx -t
sudo systemctl reload nginx

Disable screensaver

Go to Preferences Screensaver and disable the screensaver.

Choose your cryptocurrency

cd  /var/www/html

# to display Bitcoin price 
sudo wget https://github.com/cedricwalter/raspicryptoticker/files/4466181/bitcoin.zip
sudo unzip bitcoin.zip

# to display Ethereum Price
sudo wget https://github.com/cedricwalter/raspicryptoticker/files/4466186/ethereum.zip
sudo unzip ethereum.zip

Install LCD drivers

My screen is the 3.5” version

# install LCD driver
sudo apt update
sudo apt upgrade
sudo apt install git 
rm -r LCD-show
git clone https://github.com/goodtft/LCD-show.git
sudo chmod -R 755 LCD-show
cd LCD-show/
sudo apt-mark hold raspberrypi-bootloader
sudo ./LCD35-show  # PI will reboot now automatically

-deactivate
This tells xscreensaver to pretend that there has just been user activity. This means that if the screensaver is active (the screen is blanked), then this command will cause the screen to un-blank as if there had been keyboard or mouse activity. If the screen is locked, then the password dialog will pop up first, as usual. If the screen is not blanked, then this simulated user activity will re-start the countdown (so, issuing the -deactivate command periodically is one way to prevent the screen from blanking.)