Thanks to this java library you can easily run integration test against a real mongo database. It is best to always mock your dependencies in true unit tests, but sometimes you need to test against the real thing.
It will
download mongodb (and cache it)
extract it (and cache it)
java uses its process api to start and monitor the mongo process
public class MongoDbCallback implements BeforeAllCallback {
    private static MongodExecutable mongo;
    @Override public void beforeAll(ExtensionContext context) throws Exception {
        if (MONGO != null) {
            System.out.println("MongoDB already up and running");
        } else {
            var version = Version.Main.V4_0;
            var port = 27000;
            var config = new MongodConfigBuilder()
                    .version(version)
                    .net(new Net(port, Network.localhostIsIPv6()))
                    .build();
            mongo = MongodStarter.getDefaultInstance().prepare(config);
            mongo.start();
            System.out.println("Mongo started {} on port {}", version, port);
        }
    }
}
You can now annotate your integration test with @MongoDbTest and use the mongoClient connected to localhost:27000
RabbitMQ is an open-source message-broker software that originally implemented the Advanced Message Queuing Protocol and has since been extended with a plug-in architecture to support Streaming Text Oriented Messaging Protocol, MQ Telemetry Transport, and other protocols.
RabbitMQ is the most widely deployed open-source message broker. Message brokers are a communication technology used for applications to communicate between them. They act as an intermediary platform when it comes to processing communication between two or more applications.
Microsoft Azure, commonly referred to as Azure, is a cloud computing service created by Microsoft for building, testing, deploying, and managing applications and services through Microsoft-managed data centers.
Deployment name: choose a deploymentname. e.g. rabbitmq
Save the application password carefully, it wont be displayed again.
Number of Slave machine: 2 or more is recommended
Environment Configuration
Authentification Type: password or shh
Save the Authentification password carefully, it wont be displayed again.
Click create
Wait a bit till all 3 VM’s created. One acting as a master and 2 as slaves in the example above. The names of each VM will be your Deployment name followed by a number. E.g. rabbitmq1, rabbitmq2, rabbitmq3. These VM will be visible under the Virtual machine page.
Note that an IP will be assigned only to a master VM by default. You can choose to assign IP’s to the other VM’s if you intend to access them independently. Also by default SSH will be enabled on port 22 for all VM’s.
Accessing the master VM
Head up to master VM, Settings – Connect menu. Azure display the SSH command to use. E.g like
Again and again I work for companies having self crafted certificate. In 2020 there is no excuse to not use a valid certificate. There is now Let’s encrypt free certificates https://certbot.eff.org/
Here are some solutions how to fix this for Git, Nexus, maven and Java
Git
Bad solution
Is to avoid SSL certificate checks all together (from a security standpoint this is very bad)
git config --global http.sslVerify false
Best option
Is to add the self-signed certificate to your certificate store, you need to obtain the server certificate tree using chrome or firefox.
Navigate to be server address. Click on the padlock icon and view the certificates. Export all of the certificate chain as base64 encoded files (PEM) format.
Add the certificates to the trust chain of your GIT trust config file In Git bash on the the machine running the job run the following:
git config --list
find the http.sslcainfo configuration this shows where the certificate trust file is located.
3. Copy all the certificates into the trust chain file including the "- -BEGIN- -" and the "- -END- -". Make sure you add the ROOT certificate Chain to the certificates file
Nexus
Bad option
You can also tell Apache Maven to accept the certificate even though it isn’t signed. invoke Maven MAVEN_OPTS with
-Dmaven.wagon.http.ssl.insecure=true
If the host name configured in the certificate doesn’t match the host name Nexus is running on you may also need to add in MAVEN_OPTS
-Dmaven.wagon.http.ssl.allowall=true
Best option
Install a real certificate in Nexus or Import the faulty certificate in your JDK cacert running
Tezos is a decentralized blockchain that governs itself by establishing a true digital commonwealth. It facilitates formal verification, a technique which mathematically proves the correctness of the code governing transactions and boosts the security of the most sensitive or financially weighted smart contracts.
I will be constantly updating this document, if you have any issues please let me know. These instructions were used for building a node on the date specified above.
Tezos delegation only requires your public key. Your private key is not required and as such your security is never compromised.
Download Ubuntu 20.04 LTS and install it on a notebook, VMWare, ….
Note: You don’t need Ubuntu desktop edition, the server edition is more than enough, but a browser will be helpful to check the synchronization state or tzstats.
When using this setup?
For solo baking, for testing. You want to apply the mantra “Don’t trust: verify!”. You could move this setup to a datacenter but you will need to configure properly a remote signer for obvious security reasons.
Attention
This setup
Has no guaranteed uptime nor is high available: it miss an UPS to protect from power outage, software crashes (node, baker, endorser, accuser) are not monitored nor have a restart policy.
Is not immune to hardware failures: this would require another physical location and hardware redundancy,
Is not protected against network failures as it use your local network/wifi: adding a 4G USB key could help, automatic network switching and load balancer should be also on your list,
Has no monitoring system.
All the above could lead to stolen blocks and losing the baking reward.
A stolen block is one where the priority 0 baker was unavailable and the block was baked by the priority 1 (or higher) baker assigned to that block. “stealing” is a bit misleading in this case; there is no nefarious action taking place. For whatever reason, the prio0 baker had an issue (network, hardware, power, etc) and was unable to bake his assigned block. The “next guy in line” took his turn and baked. Had the prio1 baker also had issues, then prio2 would have stepped up, etc, etc, up to 64.
Note that Disruptr GmbH is in the process to offer a enterprise grade Tezos baking service on Google Kubernetes Engine:
High availability baking, endorsing and accusing: Kubernetes private cluster with two nodes located in two Google Cloud zones,
Remote signer connected to a Hardware Security Module,
Support for two highly available remote signers, both having redundant access to internet with 4G access point,
Metric-based monitoring and alerting with prometheus
opam is a source-based package manager. It supports multiple simultaneous compiler installations, flexible package constraints, and a Git-friendly development workflow. https://opam.ocaml.org. We will install the latest stable version as of today: 2.0.7. If you use another architecture: 32 bits or ARM (raspberry Pi) don’t forget to adapt the URL
git clone https://gitlab.com/tezos/tezos.git && cd tezos && git checkout mainnet
opam init --bare.  # answer twice yes (y)
make build-deps
eval $(opam env)
make # be patient this take a while
export PATH=~/tezos:$PATH
source ./src/bin_client/bash-completion.sh
export TEZOS_CLIENT_UNSAFE_DISABLE_DISCLAIMER=Y
Compile Tezos developer tools
make build-deps
make build-dev-deps # be patient this take a while
eval $(opam env)
make
Use a Tezos snapshot
tezos-snapshots provide Automatic tezos blockchain daily snapshot releases and will save us days of synchronization. It took me 10 min using Wifi ac to download a full node snapshot archive.
We install jq. a lightweight and flexible command-line JSON processor to be able to parse the JSON Github API response to locate the latest set of files.
sudo apt install -y jq
We run the following CURL that will download multiple splitted files, each 2GB, as Github limit asset size.
Time now to interact with our Tezos node! first lets create our node identity
./tezos-node identity generate
return
Stored the new identity (idsmxxxxxxxxxxxxxxxxxxxxxxxxx) into '/home/hp/.tezos-node/identity.json'.
Lets import the snapshot
./tezos-node snapshot import mainnet.importme --block BL4zuJwRkJdeQBqmhmExP4uapNebCN8BRjMZdXBXDgadfF1Fk2b

May 12 17:37:34 - snapshot: Importing data from snapshot file mainnet.importme
May 12 17:37:34 - snapshot: Retrieving and validating data. This can take a while, please bear with us
Context: 1985K elements, 152MiB read
open a new terminal and check the synchronization status by running
./tezos-client bootstrapped

Disclaimer:
  The  Tezos  network  is  a  new  blockchain technology.
  Users are  solely responsible  for any risks associated
  with usage of the Tezos network.  Users should do their
  own  research to determine  if Tezos is the appropriate
  platform for their needs and should apply judgement and
  care in their network interactions.

Current head: BLxAyj1KNCeg (timestamp: 2020-05-12T16:19:08-00:00, validation: 2020-05-12T16:19:24-00:00)
Bootstrapped.
Stop the node running by killing the process running on port 8732/9732
restart node, we use screen to run the node in the background, not attached to this terminal.
cd ~/tezos/
screen -S TezosNode
./tezos-node run --rpc-addr 127.0.0.1
<CTRL>D
To re-enter the screen process then you just re-attach to that screen. Useful if you want to kill the process.
screen -r TezosNode
Congratulation, you have a running full Tezos node!!!!
Connecting Nanoledger S HSM
Ledger Nano S: The Ledger Nano S is the most sold hardware wallet in the world. With its dedicated security chip, it protects you from unauthorized access to your crypto currencies, virtually and physically.
A hardware wallet is a cryptocurrency wallet which stores the user’s private keys (critical piece of information used to authorize outgoing transactions on the blockchain network) in a secure hardware device. Ledger Nano S is a hardware wallet that is used for the storage of and transactions in popular cryptocurrencies like Bitcoin, Ethereum and other popular altcoins.
You can use the more expensive (has a lot more features and can run 100 apps/coins at the same time) Ledger Nano X, but it make just no sense: Your nano ledger will just run one Application: the Tezos Baking App.
Install Ledger Live, initialize properly the Ledger Nano S. Install Tezos Baking on your Ledger Nano S. If you are using Ledger live, go to Settings -> Toggle ‘Developer Mode’ on. Then, go to Manager and install ‘Tezos Baking’ app.
./tezos-client list connected ledgers

## Ledger `uncommon-havanese-sorrowful-monkey`
Found a Tezos Wallet 2.2.5 (git-description: "") application running on
Ledger Nano S at [0003:0005:00].

To use keys at BIP32 path m/44'/1729'/0'/0' (default Tezos key path), use one
of:
  tezos-client import secret key ledger_hp "ledger://uncommon-havanese-sorrowful-monkey/bip25519/0h/0h"
  tezos-client import secret key ledger_hp "ledger://uncommon-havanese-sorrowful-monkey/ed25519/0h/0h"
  tezos-client import secret key ledger_hp "ledger://uncommon-havanese-sorrowful-monkey/secp256k1/0h/0h"
  tezos-client import secret key ledger_hp "ledger://uncommon-havanese-sorrowful-monkey/P-256/0h/0h"
We create an ALIAS ‘ledger_hp’ to avoid typing this long identifier, we select the first derivation path. If you use TezBox use the second ed25519 derivation path.
./tezos-client import secret key 'ledger_hp' "ledger://uncommon-havanese-sorrowful-monkey/bip25519/0h/0h"

Please validate (and write down) the public key hash displayed on the Ledger,
it should be equal
to `tz1xxxxxxxxxxxxxxxxxxxxxxxxxxxxxxxxxxxxxx`:

# check public address and confirmed on nanoledger, you should see

Tezos address added: `tz1xxxxxxxxxxxxxxxxxxxxxxxxxxxxxxxxxxxxxx`
We now setup ledger to bake for the account, the last block number can be found at https://tzstats.com/
./tezos-client setup ledger to bake for 'ledger_hp' --main-hwm '949464'

Setting up the ledger:
* Main chain ID: 'Unspecified' -> NetXdQprcVkpaWU
* Main chain High Watermark: 0 -> 949509
* Test chain High Watermark: 0 -> 0
Authorized baking for address: tz1xxxxxxxxxxxxxxxxxxxxxxxxxxxxxxxxxxxxxx
Corresponding full public key: edpxxxxxxxxxxxxxxxxxxxxxxxxxxxxxxxxxxxxxxxxxxxxxxxxxxxxxxxx
set the high water mark level to the current block to prevent any double baking
./tezos-client set ledger high watermark for 'ledger_hp' to '949511'
Now we need the chain ID
./tezos-client rpc get /chains/main/chain_id

return
"NetXdQprcVkpaWU"
And run now with the proper chain ID
./tezos-client setup ledger to bake for 'ledger_hp' --main-chain-id "NetXdQprcVkpaWU"

return
Setting up the ledger:
* Main chain ID: NetXdQprcVkpaWU -> NetXdQprcVkpaWU
* Main chain High Watermark: 949511 -> 949511
* Test chain High Watermark: 949511 -> 949511
Authorized baking for address: tz1xxxxxxxxxxxxxxxxxxxxxxxxxxxxxxxxxxxxxx
Corresponding full public key: edpxxxxxxxxxxxxxxxxxxxxxxxxxxxxxxxxxxxxxxxxxxxxxxxxxxxxxxxx
Victory!
Start the baker process
The Tezos network has successfully upgraded to protocol 006 following an on-chain governance process. The self-amending governance network upgraded from the Babylon protocol to Carthage at block 851,969, bringing about a gas limit increase and various other small fixes for the network.
The baker is a daemon that once connected to an account, computes the baking rights for that account, collects transactions from the mempool and bakes a block. Note that the baker is the only program that needs direct access to the node data directory for performance reasons.
The baker require local access to the data files that the node creates. The Tezos blockchain data is stored in an LMDB database, and the baker requires access to these files while it is operating, so the baker should be running on the same system as the Tezos node.
It will take at least 2 cycles before you get rights in a snapshot and 5 cycles before you start to bake (cycle is just under 3 days). in Tezos, snapshot is the schedule for baking rights.
open a new terminal and run
cd ~/tezos/
screen -S TezosBaker
./tezos-baker-006-PsCARTHA run with local node ~/.tezos-node 'ledger_hp'
<CTRL>D
Start the endorser process
The endorser is a daemon that once connected to an account, computes the endorsing rights for that account and, upon reception of a new block, verifies the validity of the block and emits an endorsement operation. It can endorse for a specific account or if omitted it endorses for all accounts.
The endorser don’t need to run on the same system as the Tezos node. It can run on a completely separate system, or on the same system, and only require communication with the Tezos node over RPC (to port 8732 by default).
open a new terminal and run
cd ~/tezos/
screen -S TezosEndorser
./tezos-endorser-006-PsCARTHA run 'ledger_hp'
<CTRL>D
Start the accuser process
The accuser is a daemon that monitors all blocks received on all chains and looks for:
bakers who signed two blocks at the same level
endorsers who injected more than one endorsement operation for the same baking slot (more details here)
Upon finding such irregularity, it will emit respectively a double-baking or double-endorsing denunciation operation, which will cause the offender to loose its security deposit. The accuser don’t need to run on the same system as the Tezos node. It can run on a completely separate system, or on the same system, and only require communication with the Tezos node over RPC (to port 8732 by default).
cd ~/tezos/
screen -S TezosAccuser
./tezos-accuser-006-PsCARTHA run
<CTRL>D
Automating payouts
You need to set your own fee in whatever software you use to manage payouts. There are 2 tools that I recommend you to try:
TRD is a software for distributing staking rewards of delegators introduced in detail in this Medium article. This is not a script but a full scale application which can continuously run in the background as a Linux service. It can track cycles and make payments. However it does not have to be used as a service, but it can also be used interactively. The documentation can be found here. https://github.com/habanoz/tezos-reward-distributor
Bäckerei is tooling written by Cryptium Tezos Bäckerei. At a high level it manages the payments from the baker, to your delegators. Bäckerei is initialised with a TZ1 address which is used for baking. When run, it connects to a full-node and scans the entire transaction history to determine who the delegators are and how much they should get paid. Note that this full-node must be trusted. https://github.com/cryptiumlabs/backerei
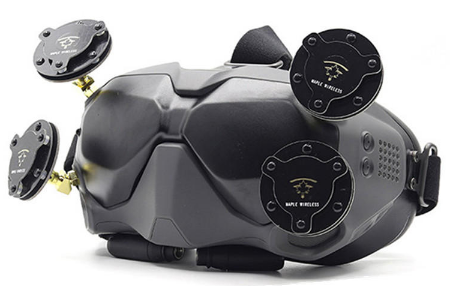
How to improve your flying experience with the DJI Digital FPV System? by adding new accessories of course!
If you find a cool new product for the DJI FPV goggles, be sure to let me know by adding a comment so I can get it added to this article.
Safely transporting your DJI Digital FPV Goggles
Skyreat Hard Carrying Case for DJI Digital FPV Goggles
Special designed Carrying Bag for DJI Digital FPV Goggles in PU + flannel material , waterproof and scratch resistance. Attention they are only suitable for stock goggles without aftermarket straps or goggle foam.
Simple lens protector for DJI FPV goggles. Print no infill & solid layers. If you’re using TPU with a higher shore hardness print the thin version, otherwise print the this version. 3D Print them yourself from https://www.thingiverse.com/thing:4089005
Improving the comfort of your DJI Digital FPV Goggles
WLYL Lycra Eleastic Head Strap Skin-friendly for DJI Digital HD FPV Goggles
Skin-friendly elastic fabric The surface of the headband is perforated, breathable, sweat-resistant and washable. Available in blue, gray and green color
URUAV Pogoda Triple Feed Patch-2 V2 5.8 Ghz 9 dBi LHCP Antenna for DJI Digital Goggles FPV Monitor Receiver Fatshark
Using LHCP circular polarization antenna for receiving, can avoid the interference of most RHCP transceiver signal.This antenna uses specially processed PCB as the feed surface, and fully compatible with DJI FPV goggles ,with no need for adapter.
Specification
Diameter : 60mm
Weight : 13.5g
Frequency : 5.8 GHz
Width : 660 MHz(5.47 – 6.13 GHz)
Match : S11 < -20db, VSWR< 1.22(in center frequency)
TrueRC Singularity 5.8ghz Stubby (4-Pack For Dji) Antenna – Lhcp
The singularity 5.8 stubby made especially for the DJI fpv system goggle. Antennas are direct fit with much lower profile than stock and claims over 50% more range
TrueRC X-AIR 5.8 GHz 10 dBi Gain Directional FPV Antenna With RP-SMA Connector
TrueRC did it again with this versatile directional antenna for the DJI FPV goggles. Thanks to smart design, you can multiply the range of your system in style. It can be used alone, horizontally, connected to the two top SMA. Or it can be used in pair, flipped vertically and connected to the two SMA on each sides, for maximum video link resiliency.
Optical improvement for your DJI Digital FPV Goggles
Corrective Lenses for DJI Digital FPV Goggles
Allows users to wear the DJI FPV Goggles without myopia glasses and eliminates any discomfort. You need to choose the corrective lenses according to your degree of myopia.
Despite today’s digitization hype, most problems rather reflect small data problems than big data problems. In many contexts, data collection efforts are still costly or even impossible. A prime example is early stage investing in startups. Almost all data that would be relevant for applying AI is kept private by business angels that are reluctant to open their data vaults out of fear to lose their competitive edge. And even if they do so, available data is often little and of low quality. Simulations may help in such circumstances by showing a novel approach in which we simulated survival and profitability of early-stage startups that on average outperform professional human investors.
Here are some startups or groups working on that subject:
We investigate whether digital traces can be used to predict early stage startup survival. Based on common survival factors from the entrepreneurship literature, we mined the digital footprints of 542 entrepreneurs and their ventures. Using a context-specific text mining approach, we performed a bootstrapping simulation in which we predict 5-year survival for different survival rates that range from 50% to 10%. Our results indicate that we can predict 5-year survival with an accuracy of up to 91%. With this study, we will provide an evidence-based taxonomy of digital traces for predicting early stage startup survival, identify the most important digital traces for doing so and benchmark our predictive approach against the actual investments of 339 business angels.
Port Knocking is a technique to secure services behind a firewall until a specific knock sequence is given. Once that sequence is given, the IP address that initiated the knock may be allowed to access the service for a short period of time. A knocking server listens to all traffic on an Ethernet (or PPP) interface, looking for special “knock” sequences of port-hits. A client makes these port-hits by sending a TCP (or UDP) packet to a port on the server.
This is a bit paranoid, but it add another layer of security, an attacker will have either to try all ports combinations or know the secret combination (knock) to be able to connect to your SSH daemon for example.
First, you’ll have to be sure to have a port knocking client, or you will be kick out forever of your own server!
Git is a free & open source, distributed version control system designed to handle everything from small to very large projects with speed and efficiency.
Every Git clone is a full-fledged repository with complete history and full revision tracking capabilities, not dependent on network access or a central server. Branching and merging are fast and easy to do.
Git is an entirely different beast from Subversion, so it took me a bit to figure out exactly how to use it. Here is a collection of Git cheat sheet including version control best practices.
XMR-Stak is a universal Stratum pool miner. This is the NVIDIA GPU mining version; there is also an AMD GPU version, and a CPU version.
Docker® containers are often used to seamlessly deploy CPU-based applications on multiple machines. But Docker Engine does not natively support NVIDIA GPUs with containers.
I have dockerized the Nvidia GPU-mining version, so it is now running in nvidia-docker.
Containerizing GPU applications provides several benefits, among them:
Reproducible builds
Ease of deployment
Isolation of individual devices
Run across heterogeneous driver/toolkit environments